How to Stop Fake Virus Notifications in Microsoft Edge
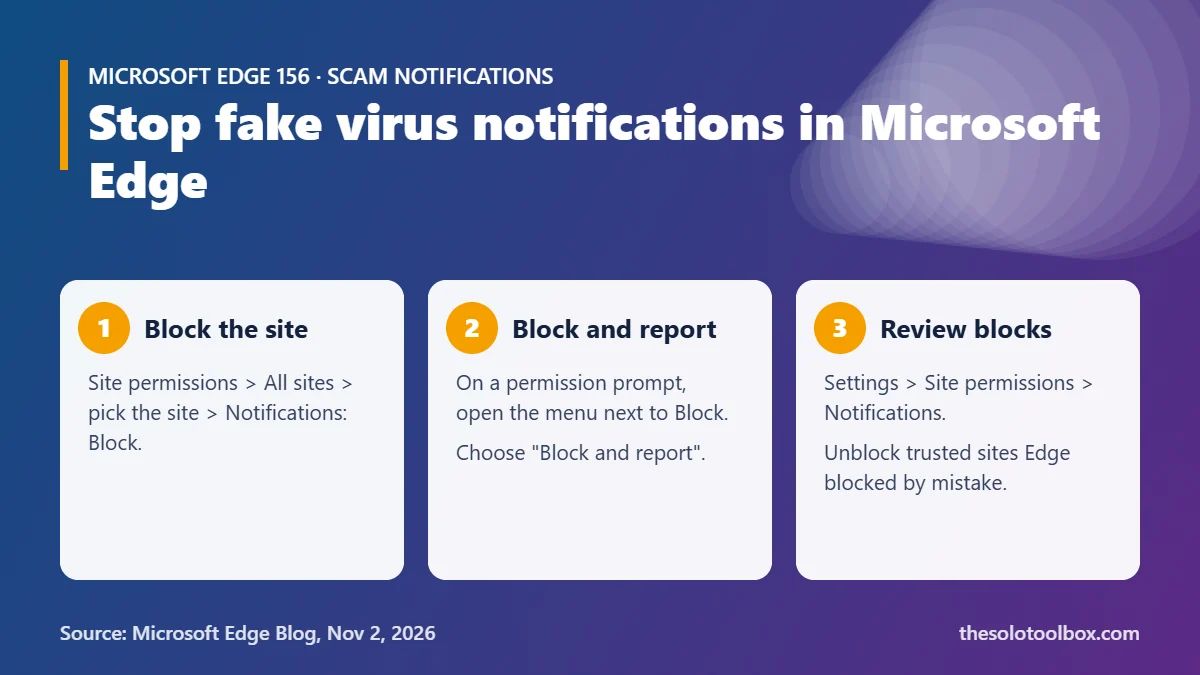
Fake “virus detected” or “your PC is infected” pop-ups in the corner of your screen are usually website notifications from a site you once clicked Allow on. To stop them in Microsoft Edge, open Settings > Privacy, search, and services > Site permissions > All sites, select the site, and set Notifications to Block. Since Edge 156, Edge also switches off notifications automatically when its scam detection catches a site using them to push fake alerts, and it adds a Block and report option to the permission prompt.
This guide covers how to find and block the site, what changed in Edge 156, how to review sites Edge blocked, and how to tell a fake alert from a real one.
Before you start
- Applies to: Microsoft Edge on Windows and macOS; the automatic blocking needs Edge 156 or later
- You need: nothing beyond Edge itself
- Time: about 3 minutes
- Checked: November 5, 2026, against Microsoft’s Edge blog post of November 2 and Microsoft Support’s notification guide
Why fake virus alerts keep appearing
Scam pages ask for notification permission with a misleading instruction, such as “click Allow to prove you’re not a robot.” Once you allow it, the site can send alerts through Windows or macOS even after you close the tab. Microsoft Support notes that notifications from an allowed site “will still appear even if Microsoft Edge is closed.” Each alert links back to a scam page, often a fake support number or a fake antivirus subscription.
These alerts are not from Windows Security or Microsoft Defender. Real Windows Security alerts don’t come from a website address, and they don’t ask you to call a phone number.
How to block the site sending the alerts
From the notification itself
- When the next fake alert appears, don’t click its main body or any button in it. Microsoft warns that clicking other buttons on a fake alert “may simply open more popup windows.”
- Select the … (three dots) menu on the notification.
- Choose the option to turn off notifications from that site.
From Edge settings
- In Edge, select Settings and more (the three dots, top right) > Settings.
- Go to Privacy, search, and services > Site permissions > All sites.
- Select the site sending the alerts. If you don’t recognize the name, look for odd domains you never meant to visit.
- Find Notifications and choose Block.
You can jump straight to the notification list by typing edge://settings/content/notifications into the address bar. Remove or block every site in the Allow list you don’t recognize.
From the address bar
If you’re on the site, select View site information (the icon left of the address), then under Permissions for this site > Notifications choose Block.
What Edge 156 changed
Microsoft’s Edge team described two changes on November 2, 2026:
- Automatic blocking. When Microsoft Defender SmartScreen or Edge’s Scareware blocker detects a scam that arrived through a notification, Edge now disables notifications from the site that sent it. The next time Edge starts, an information bar reads “Microsoft Edge blocked notifications from a suspicious site in your last session,” with Learn more and Got it buttons.
- Block and report. On a notification permission prompt, open the menu next to Block and choose Block and report…. You can include the requesting URL and a screenshot, which feeds SmartScreen before the site sends its first alert.
Microsoft says these protections arrived with “last month’s rollout of Edge 156.” To check your version, open edge://settings/help; Edge updates itself from that page.
How to review sites Edge blocked
If Edge blocked a site you trust, such as a webmail or calendar service, Microsoft says you can review sites with blocked notifications and unblock them from Edge Settings. Open edge://settings/content/notifications, find the site under Block, and change it back to Allow. Microsoft’s blog shows the blocked sites listed on that settings page; we could not confirm whether a separate label marks the ones Edge blocked automatically.
Turn on Scareware blocker
Scareware blocker is the Edge feature that detects full-screen fake virus pages and feeds the new notification blocking. Microsoft says it has been on by default on qualifying PCs for just over a year. To confirm it on your machine, open Settings > Privacy, search, and services, find the Security section, and make sure Scareware blocker is switched on. If you don’t see the option, your PC or Edge version may not qualify yet.
If you already called a number or paid
- Hang up and don’t let anyone connect to your PC. If you installed a remote-access app at their request, uninstall it.
- Call your bank or card issuer using the number on your card and dispute the charge.
- Change the password of any account you typed in while on the scam page, starting with your Microsoft account and email.
- Run a full scan in Windows Security > Virus & threat protection.
Fake alert vs. real alert
| Sign | Fake website notification | Real Windows Security alert |
|---|---|---|
| Source shown | A website domain under the message | Windows Security, no web address |
| Asks you to call | Often | Never |
| Asks you to pay or renew | Often | No |
| Opens a web page | Yes | Opens the Windows Security app |
FAQ
Will blocking notifications stop all pop-ups?
No. Notifications and pop-ups are different. Pop-ups open inside the browser window and are handled by Edge’s separate pop-up blocker under Site permissions > Pop-ups and redirects.
Can I turn off all website notification requests?
Yes. On edge://settings/content/notifications, switch off the Ask before sending toggle so sites can’t show the request at all. Sites you already allowed stay allowed until you remove them.
Do these alerts mean my PC has a virus?
Not by themselves. A site with notification permission can send alerts without anything being installed. Run a Windows Security scan if you downloaded or installed anything from the scam page.
Does Chrome have the same automatic blocking?
The November 2 change is Edge-specific. Chrome has its own notification settings and scam protections; see our guide to Chrome’s ClickFix protection.
Next step
Open edge://settings/content/notifications now and remove every site in the Allow list you don’t use. While you’re in browser settings, review your add-ons with our guide to checking Chrome extension permissions; the same checks apply to Edge extensions. If a fake alert told you to join a Teams call or install support software, read our guide to fake IT support on Microsoft Teams.
How we checked: the Edge 156 behavior and wording come from Microsoft’s Edge blog post of November 2, 2026; settings paths come from Microsoft Support’s “Manage website notifications in Microsoft Edge,” read on November 5, 2026. Menu labels can differ slightly between Edge versions, and we did not trigger the automatic block ourselves.
Sources
- Client-side threat detection: how Scareware blocker uncovered malicious notification abuse (Microsoft Edge Blog, Nov 2, 2026)
- Manage website notifications in Microsoft Edge (Microsoft Support)
- Protecting more Edge users with expanded Scareware blocker availability (Microsoft Edge Blog, Oct 31, 2025)
- Scareware blocker (Microsoft Edge features)